In 10 Easy Steps, Learn How to Create a WordPress Blog

Starting a blog can be pretty daunting for beginners. What most people struggle to understand is the step-by-step of how it’s done. You come across technicalities that you’ve probably just heard for the first time. But don’t fret; this article aims to lift some of the weight off your shoulders.
Why WordPress Blogging?
WordPress is one of the most prominent Content Management Systems (CMS) today. It’s flexible and easy to use. People with different levels of knowledge regarding technical aspects of blogging can use this efficiently and to their advantage. You don’t necessarily have to be a technical blogging expert. WordPress website building might seem complex, but you can still build a fantastic blog with the basics.
10 Step-by-Step WordPress Blog Creation
Even though WordPress is considered one of the most accessible platforms to build a blog, it might still be complicated for newbies to work on, which is understandable. Here’s our guide to creating your first WordPress blog, and it just features ten simple steps!
1. Get a Hosting Plan and Register a Domain Name
To make use of a host, you have to choose WordPress.org. Unlike WordPress.com, it’s self-hosted and paid, which means it has more custom features and site control to maximize your blogging efforts.
Your hosting provider will store site files on the server so users can access your website. Web hosts also help with inconsistent maintenance of the site’s security, updates, and backups. What’s great about them is that they can handle many technical tasks for you. This is especially helpful for beginners.
Here are some top WordPress hosting providers we can recommend for you to check out:
- WP Engine
- Pros: a WordPress managed hosting plan, excellent uptime and speed, free SSL, staging areas for plugins and themes
- Cons: can be expensive, additional fees for exceeding visitors and storage
- BlueHost
- Pros: best cost value, officially recommended by WordPress, 24/7 customer service, one-click easy setup, SSL, excellent uptime
- Cons: no monthly payment option; the cheapest plan doesn’t include free site migration
- SiteGround
- Pros: recommended by WordPress, 24/7 support, Google cloud servers, free SSL, good uptime and speed, free file transfer, free email accounts, offers location-specific hosting
- Cons: expensive
- HostGator
- Pros: one-click setup, free SSL, free domain name, good uptime and speed, unlimited bandwidth, 24/7 support, suitable for small businesses
- Cons: High cost for a renewal
- InMotion
- Pros: 24/7 support, unlimited bandwidth, and emails
- Cons: needs uptime improvement
To register a domain name, you have two options: register under the same host provider or opt for a DNS (domain name server) registrar. Either way, there’s only one procedure. You’ll search for a domain name, and the registrar tells you its availability, cost, or variations if the name is already taken.
2. Install WordPress
Once you’ve selected a hosting plan, WordPress installation is next. The installation varies on the plan. If it is a managed WordPress hosting, you are no longer required to install WordPress. For other web-hosting providers, you’ll have to download and install the platform manually.
Regardless of the installation method, you will need to add a domain name and create your admin credentials as part of the process. Don’t worry about technicalities because each plan has its own installation guide!
After successful installation, you will also see the dashboard, where you can find all the tools you need to modify, set up, and update your WordPress blog. Make sure to familiarize yourself with it.
3. Choose A Site Design
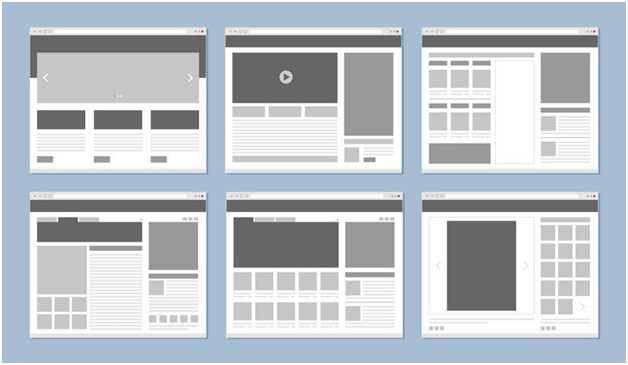
Think about how you would want your site to look like. If you’re unsure, you can look for ideas on blogs you enjoy reading or blogs from the same niche. Remember to consider the type of blog you’re working on and ensure it matches the look of your site, too.

After deciding on a layout for your blog, you can start choosing from WordPress themes. From the dashboard, go to Appearance. Choose Themes > Install Themes > Search. WordPress offers many awesome themes, both free and paid. You can start with a neat and simple look because the content is still more important than the design.
4. Fill In The Basics
Located in the dashboard’s Settings > General Settings are basic blog details for you to fill out. This is essential for consistent branding. You can change the details later if needed. All you have to fill out, for now, are the Site Title and Tagline.
5. Start Building Your Pages
Think about what you want to appear on the navigation bar. The number of pages depends on your classification of blog topics. An SEO-friendly tip for building pages is to use your target keywords as page titles. Suppose you wish to write something about tips on Amazon suspension appeal. You can set a page titled Amazon Suspension that will contain blogs related to that topic.
To add a page, go to the dashboard and select Pages > Add New.
6. Set Up Your Homepage
To start with the setup, go to the dashboard and select Settings > Reading. Setting up the homepage comes in two options:
I want the homepage separated from the blog page. This setup is typical for general business sites. Ensure you’ve already created a homepage from step 5. From Reading, select the Static Page option. Choose your created homepage for the Homepage setting and your created blog/posts page for the Posts Page setting.
I want the blog page to be the homepage. For websites that focus solely on producing blogs, you can set the blog page as the default front page. From Reading, select Your Latest Posts.
7. Build the Navigation and Widgets
Organize the buttons which lead users to the correct pages. From the dashboard, select Appearance > Menus. This function allows you to choose what pages should appear on the navigation bar and organize them in your preferred order. The navigation menu varies according to the theme, but they all have the same procedure.
For widgets, select Appearance > Widgets. Build and fill your sidebars with handy widgets: social media icons, testimonials rotator, RSS feed, grouped monthly archives, recent posts widgets, and more.
8. Add Plug-Ins for Enhancement
Plugins expand the functionality of your blog site. What’s good about this is that the essential plugins to install are free! Find Plugins from the dashboard and start exploring the different categories.
What we recommend for starters are the following:
- Yoast SEO – This plugin is an excellent optimizing tool. They are sections located at the bottom of your blog posts with content recommendations to get you optimized for search engines.
- Jetpack – Jetpack is a security plugin. It is essential to protect your blog and get notified of any suspicious activities.
- XML Sitemap Generator – A highly recommended tool for a neat site structure and easier indexing. You will need this to utilize the webmaster tools properly.
9. Set Up Essential Google Tools
It would be best if you do a little SEO work to start monitoring your blog’s performance. When it comes to site performance, Google Analytics is a top recommended tool. It has everything you need for site monitoring and valuable insights. Beginners can also easily catch up to how this tool works!
We also recommend the Google Webmaster Tool (Google Search Console). The primary purpose of this tool is to ensure that search engines properly index your blog. Without this, you might start to wonder why your pages don’t appear in the search results. The tool also includes other features that help improve the website.
10. Create Your First Blog!
Congratulations on reaching the final step! You are now fully prepared to use WordPress blogging to your heart’s content. To start writing, go to the dashboard, select Posts > Add New.
A blog post contains blocks that you can organize to make a proper structure. The post settings are located on the right side: publishing settings, categories, tags, post visibility, image settings, URL slugs, post excerpt, and post preview.
Final Word
Creating a WordPress blog might seem overwhelming at first, but once you figure out your way around it, you’ll realize just how easy it is to use.
To prevent yourself from information overload, don’t stray away from what’s most important here: the content. A visually appealing and user-friendly blog, indeed, gets users to stay and explore, but the content, especially the keywords you employ, is what gets them to click on your blog in the first place. Ensure that your content is optimized and the entire website looks decent enough for your visitors. We wish you a happy blogging experience!


